Friday, October 24, 2014

Reset Forgotten Windows 8.1 Admin Password on Surface Pro 3

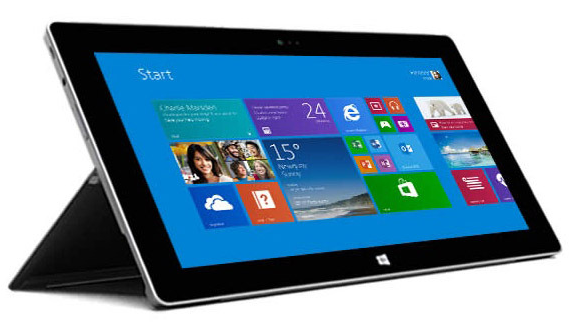
When forgot admin password for signing in to your Microsoft Surface Pro 3 running Windows 8.1, what are your options? Reset the forgotten Windows 8.1 admin password or factory restore your Surface? I think most people would like to choose the former, instead of performing a factory restore which will cause losing all data.
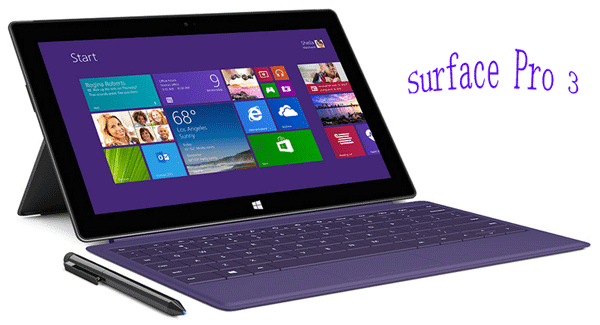


A Password reset disk should be the easiest way to reset/remove Windows 8.1 admin password without losing any data on your Surface Pro 3. And there are two different kinds of reset disks you can choose from.

  1.  A password reset disk previously created before password forgotten.
  2. A password reset disk you create after password forgotten.
Following see how to reset Windows 8.1 Admin password on Surface Pro 3 respectively with the 2 kinds of reset disks.


Way 1: Use previously created password reset disk

If you have previously created a password reset disk for your Windows 8.1 administrator account on Surface Pro 3, that’s better. Now it comes in handy.

Step 1: When you fail to sign in to Windows 8.1 with an incorrect password, the "Reset password" link will appear on the sign-in screen.
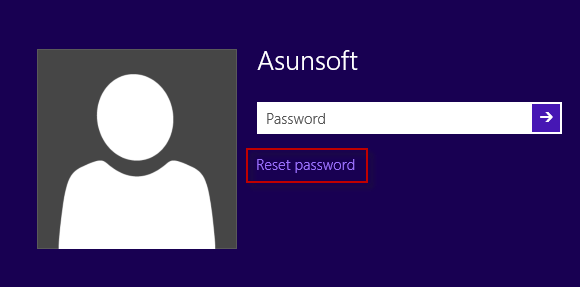
Step 2: Tap or click on the "Reset password" link.

Step 3: Insert your previously password reset disk into your Surface Pro 3 tablet.

Step 4: Follow the "Password Reset Wizard" to reset password.
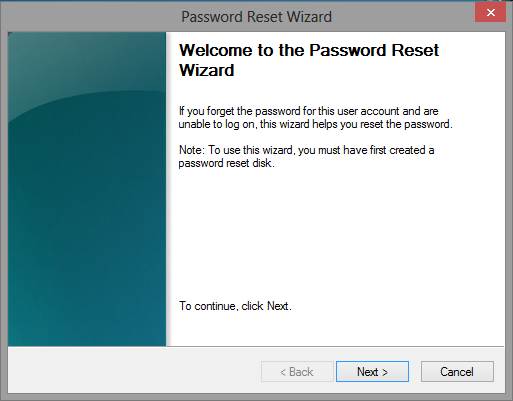
When finish password reset, you can sign in to your Surface Pro 3 with the new Windows 8.1 admin password.

Way 2: Use reset disk created with Windows Password Geeker.

If you have no any reset disk, never mind, instantly create one with the tool – Windows Password Geeker. Then use it to reset password.

Step 1: Prepare another accessible computer.


As you have forgotten Windows 8.1 admin password and were locked out of your Surface Pro 3 tablet. You need to use another desktop/laptop/surface tablet to create a password reset disk.

Step 2: Create password reset disk.


1.  Install Windows Password Geeker on that accessible computer.
2.  Insert one USB flash drive into the accessible computer.
3.  Launch Windows Password Geeker. Follow its guide to burn it to the USB drive.

Burning successfully means you get a password reset disk.

Step 3: Boot Surface Pro 3 from the reset disk.


1.  Start your Surface Pro 3 tablet and enter its UEFI mode.
2.  Set it to boot from the usb disk.
3.  After it boots, it will loads Windows PE and display Windows Password Geeker screen.

Step 4: Reset Windows 8.1 Admin password.
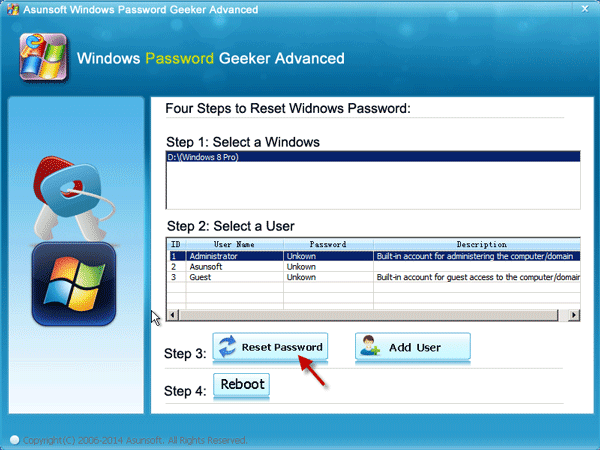


1.    Select Windows 8.1 system running on your Surface Pro 3.
2.    Select password forgotten admin account.
3.    Click on Reset Password.

Password will be reset to blank. Then you can sign in to your Surface Pro 3 without password.

Thursday, October 23, 2014

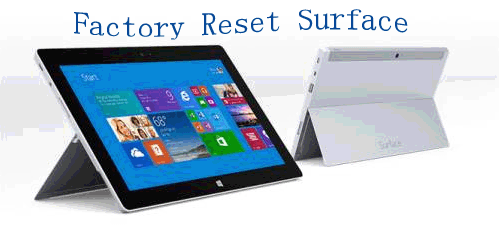
Two Ways to Factory Reset Microsoft Surface

Factory reset can solve many problems on Microsoft Surface. No matter you are
using Surface Pro, Surface Pro 2, Surface Pro 3, or the original Surface RT, there are
many situations where you may want to reset your Surface to factory settings. For
example:
  • Windows 8/8.1/RT system running on your Surface failed or crash, a reset can repair this problem.
  • You want to reset your surface to factory defaults for someone else to use.
  • When forgot password for signing in to your surface, you can regain access to your surface after factory reset.


There are 2 ways to factory reset surface according to whether you can sign in to Windows or not.

Way 1: Factory Reset Microsoft Surface within Windows

Step 1: Within Windows 8, swipe in from the right side of the screen. Tap Settings.
Step 2: Tap Change PC settings.
Step 3: Tap General. Swipe down and find Remove everything and reinstall Windows. Tap Get started.
Then just follow its guide to finish the following a few reset steps.
Step 4: Tap Next.
Step 5: Select Just remove my files or Fully clean the drive.
Step 6: Tap Reset.
In the reset process you can see your Surface restart automatically and surface logo displays. It will take several minutes to finish reset.

Way 2: Factory reset Surface from the Windows sign-in screen.

Note: If you forgot password for signing to surface, see the post – Microsoft Surface Forgot Windows 8 Password, How to Sign in? Factory reset is indeed an option, which can help get a clean Windows system without password. But it is not the only and best solution. 

Step 1: Power on your surface and get to the Windows sign-in screen.
Step 2: Tap the Power icon in the lower right corner of the sign-in screen.
Step 3: Press and hold the Shift key and tap Restart. (Do not release the Shift key until your surface restarts successfully.)
Step 4: The surface displays the Choose an Option screen. Tap Troubleshoot.
Step 5: Tap Reset your PC.
Step 6: Surface restarts and surface logo appears. Then it displays Reset your PC screen. Tap Next.
Step 7: Select Just remove my files or Fully clean the drive.
Then the following process is same as the process of factory reset within Windows.

Note: Factory reset will wipe all your personal files and settings on your surface. So you are strongly recommended to back up your important data regularly.

Tips: If you are using Surface RT and forgot the password for signing in, factory reset should be the only one solution. 

Wednesday, October 22, 2014

Microsoft Surface Tablet Forgot Windows 8 Password, How to Sign in?

How can you sign in when forgot Windows 8 password on your Microsoft Surface?

Most of us have the habit of setting password for our devices, desktop/laptop/surface tablet/mobile phone etc. To safeguard data security, some people even regularly change the password, which makes it easy to forget the password. While it is not that bad when you forgot Windows 8 password on your surface.

Now in this article I will show several effective solutions for Windows 8 password forgotten on Microsoft Surface. No matter you are using Surface RT, Surface 2, Surface Pro, Surface Pro 2, and Surface Pro 3, from here you can find one appropriate solution to regain access to your Windows 8.


Part 1: Forgot Microsoft Account Password
Part 2: Forgot Local Account Password

Part 1: Forgot Microsoft account password.

Solution: Reset Microsoft account password online


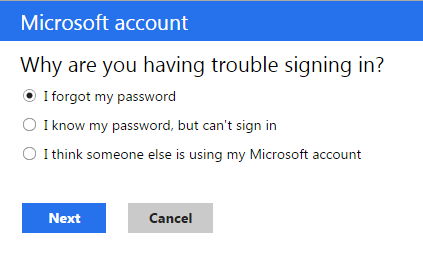
If you used an email address and password to sign in to your Windows 8 surface, you can reset your password online.


Part 2: Forgot Local account password.

If you forgot password for your local account, there are 4 options.

Solution 1: Use password hint to retrieve password.


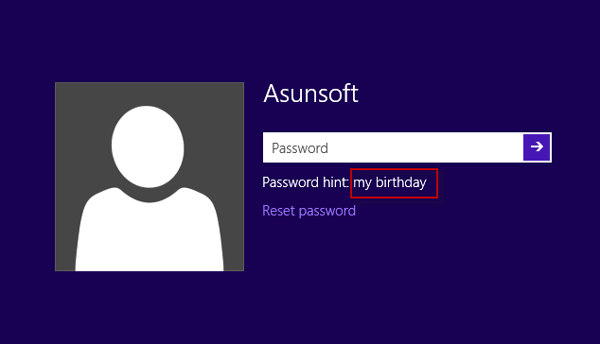
If you have ever set a password hint, then when you sign in to Windows 8 with a wrong password the password hint will appear on the logon screen. Use the hint to memories your password.


If you really can’t remember your password even with the help of hint. Read on the following solutions.

Solution 2: Use administrator account to reset password.


If you still have another administrator account and password on your surface, you can sign in to your Windows 8 with this administrator account and reset any other account’s password. If you have no another administrator account, just read on the following methods.

Solution 3: Reset password with reset disk.


1.       If you have ever created a password reset disk for your account, insert it into your surface to reset password.
2.       If you have no any previously created reset disk, you can use a third-party tool like Asunsoft Windows Password Geeker to instantly create a reset disk, and then use it to reset Windows 8 password on your surface tablet.

Note: This solution doesn’t work with the original Surface RT.

Solution 4: Reset your surface.


The last solution is to reset your surface, which means restoring your surface to its factory settings. A reset will erase all your personal files, apps and other data. There is no doubt that your Windows 8 password will be removed so that you can sign in to your surface without password.

Warning: If you have no any backup and don’t want to lose any data on your surface, you are not recommended to reset your surface.


Thursday, October 16, 2014

How to Open Password Protected ZIP File without Password

" How to open password protected zip file without password? I just downloaded an encrypted zip file from the web. But can’t open it for I have no password. Please help! "

Have you ever encountered such a situation where you are locked out of a password protected ZIP file for various reasons? Many people thought there would be no way to open an encrypted ZIP file without password and have to helpless give up the encrypted zip file. If you also think so, then you are absolutely wrong. 

No matter how,  there are 4 ways which maybe can help you open the password protected zip file.

Way 1: Find password in the ZIP archive.


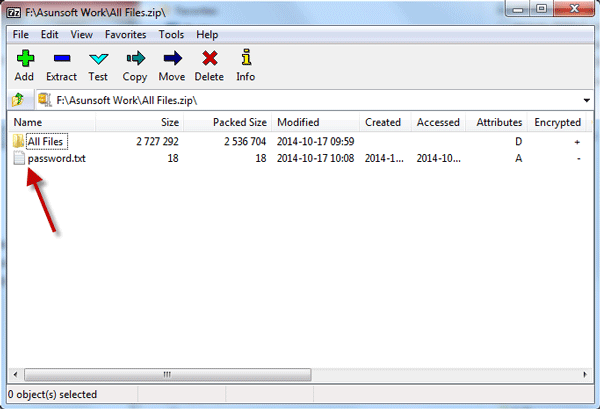
Open the password protected ZIP archive. View all the files in the list on the left side. You maybe can find the password there.


Way 2: Find password on the download page.

Way 3: Use the download website as the unzip password.

Way 4: Use special tool to find ZIP password


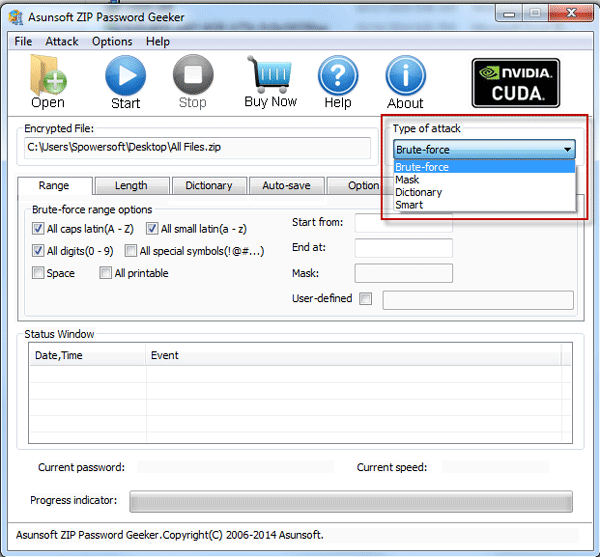
If the 3 methods above don’t work, use a special zip password tool to find zip password and then open the password protected zip files. The ZIP Password Geeker is just such a powerful tool.

Step 1: Install ZIP Password Geeker.
Download ZIP Password Geeker and install it on your computer.
Step 2: Open password protected ZIP archive.
1. Run this tool.
2. Click on Open button.

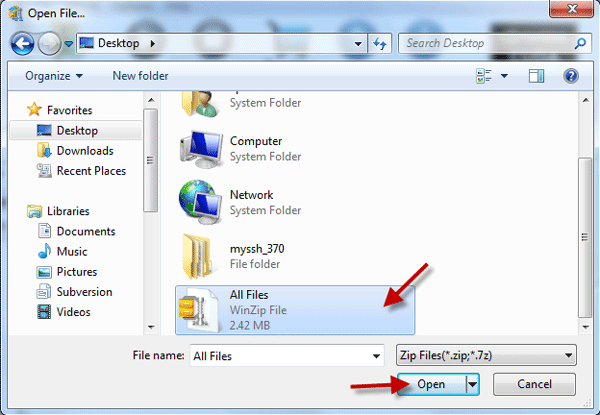
3.Navigate to the path to your password protected ZIP archive.


4. Click on Open button to import it to ZIP Password Geeker.

Step 3: Find ZIP password.
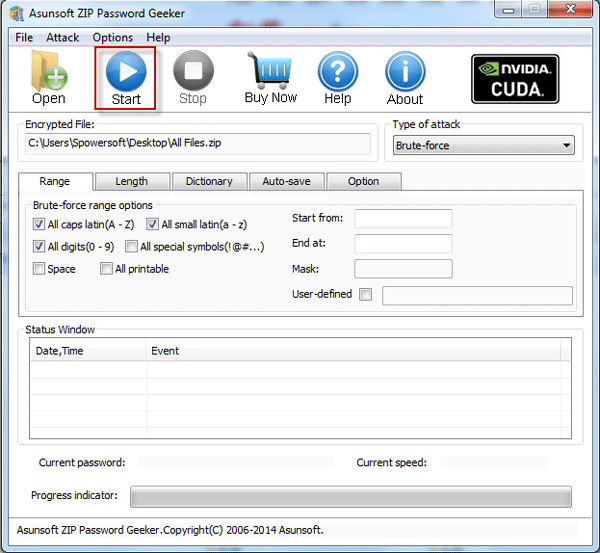
1. Click on Start button.


2. It immediately starts to find your ZIP password with very fast speed. Just wait patiently.

Step 4: Extract password protected zip files.
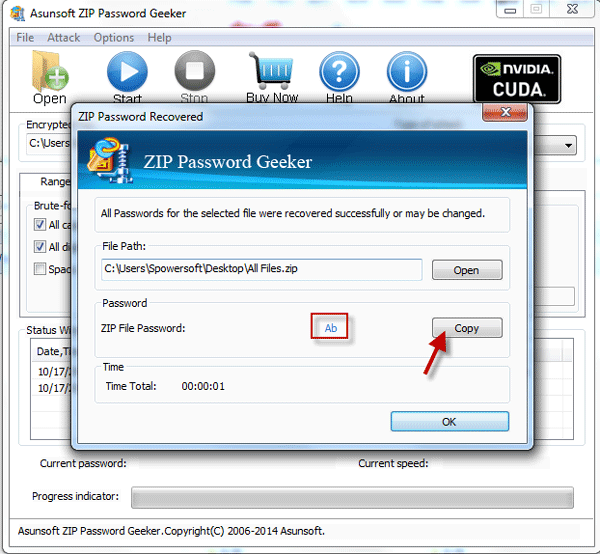
It will successfully find your ZIP password. Just click on Copy button and then paste the password to open your password protected zip files.


On the other hand, some people asked how to open password protected ZIP files when forgot the password. One way is trying the best to memories the password. If you really can’t remember the password, then you also can use the ZIP Password Geeker to recover the password and open your password protected ZIP files. The good news is that ZIP Password Geeker provides four attack types, which can help fasten the password recovery speed and greatly shorten the recovery time.
Thus it can be seen, you still can find some efficient ways to open password protected ZIP files even you have no password. 


Wednesday, October 15, 2014

How to Unlock WinRAR Password Protected Files

You cannot unpack a password protected WinRAR file without password. So you are locked out of your WinRAR file? Then how can you open the files/folders/documents in the WinRAR file? Take it easy. Now share you the powerful tool – RAR Password Geeker, which can help you unlock your password protected WinRAR files
Step 1: Install RAR Password Geeker
Download RAR Password Geeker on Asunsoft official site. And install it on your computer.

Step 2: Launch RAR Password Geeker.

Step 3: Open password protected WinRAR file.

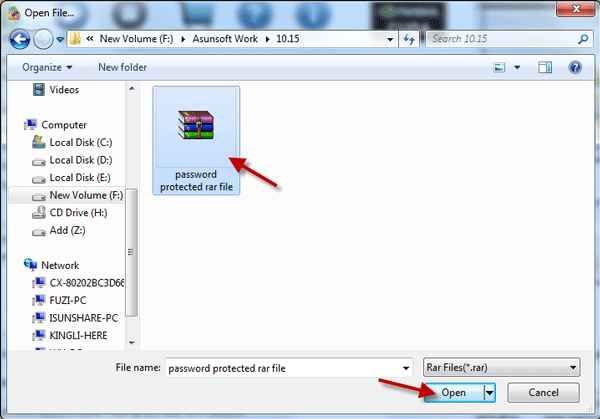
1. Click on Open button.
  2.Navigate to the path to your password protected WinRAR file.
3. Select it and click on Open button.


Step 4: Find WinRAR password.

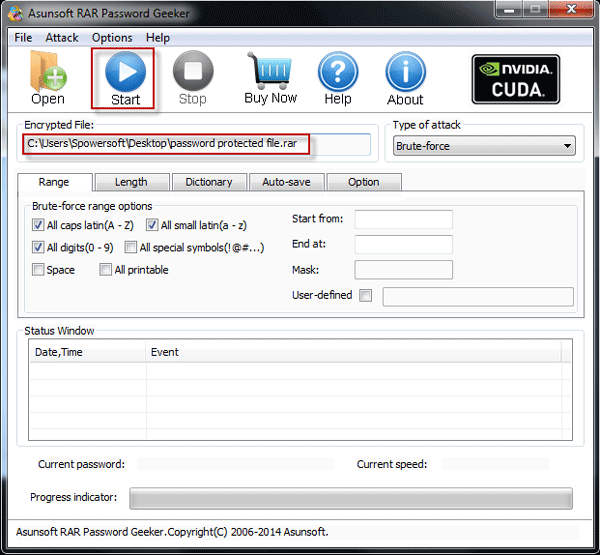
So the password protected WinRAR file is now imported into this tool. Click on Start button. Then it immediately starts to find the WinRAR password.


Step 5: Unlock WinRAR file.

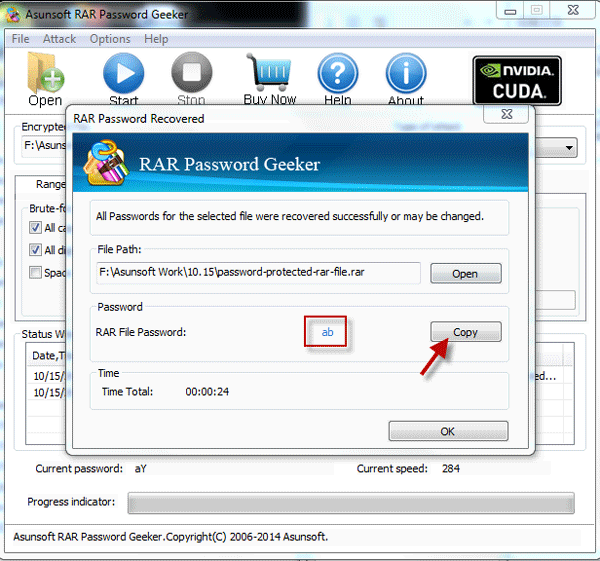
It will find the WinRAR file password with very fast speed. And the password will be displayed. Just click on Copy button and paste the password to unlock your password protected WinRAR file.


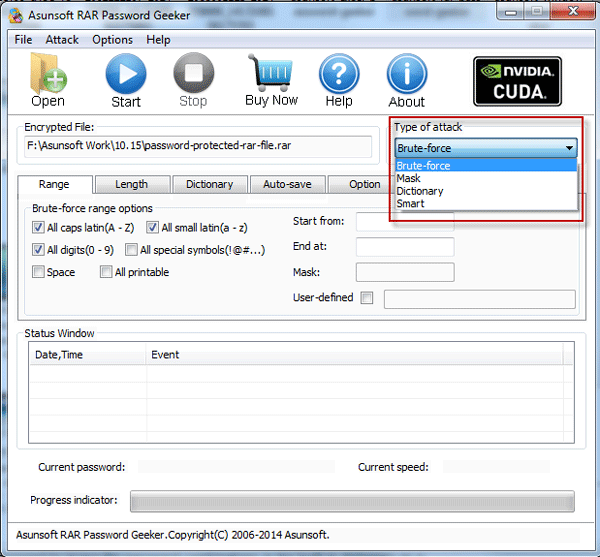
The RAR Password Geeker is a one of the most efficient and powerful RAR password recovery tool, which can help find/recover password for WinRAR/RAR files. When you forgot or lost your WinRAR/RAR files password, with this tool you can select one appropriate attack type to recover your password with the fastest speed and within the shortest time. Then unlock your password protected WinRAR/RAR files.
  1. Select the Brute-Force attack if you know your password range. Then it will find your password in the specified range.
  2. Select Mask attack and set a mask when you still can remember some parts of your password.
  3. Select Dictionary attack if your password is some keyword. It will find your WinRAR/RAR file password from its built-in dictionary.
  4. Just select Smart attack if you know nothing about the password.

No matter how, this tool will efficiently find/recover your RAR password so that you can unlock your password protected WinRAR/RAR file.

Saturday, October 11, 2014

How to Recover Excel Password If Forgot/Lost It

So you set a password to protect your Excel spreadsheet/workbook? If you forgot or lost the Excel password, how can you recover it?

When you set a password for your Excel spreadsheet/workbook you must had noticed the Caution saying "If you lose or forget the password, it cannot be recovered…" Then, is it really impossible to recover the forgotten/lost Excel password?

It’s absolutely not. Excel Password Geeker can help recover lost Excel password effortlessly. It is a powerful Excel password recovery tool, which can recover password for Excel 2003/2007/2010/2013.  Now, let’s have a look at how.

Step 1: Download and install Excel Password Geeker on your computer.

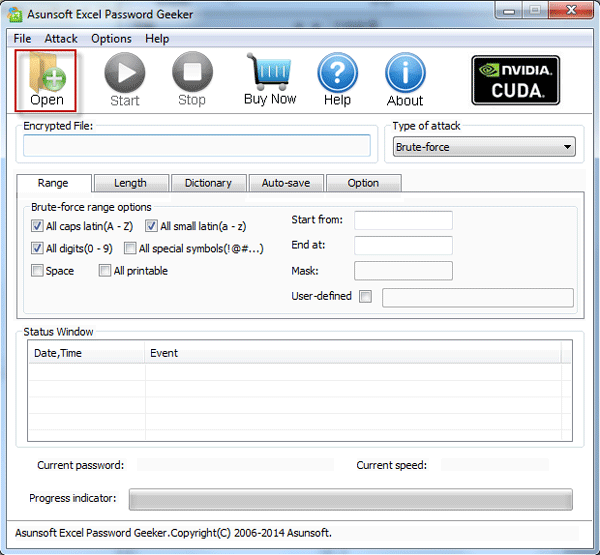
Step 2: Run this tool. Click on Open button.


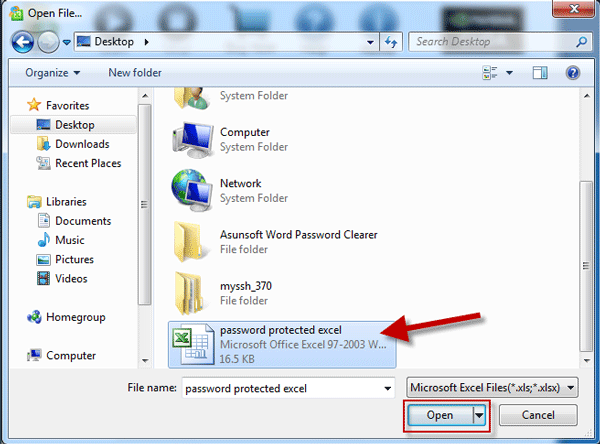
Step 3: Navigate to the path to your password protected Excel spreadsheet/workbook. Click on Open button.


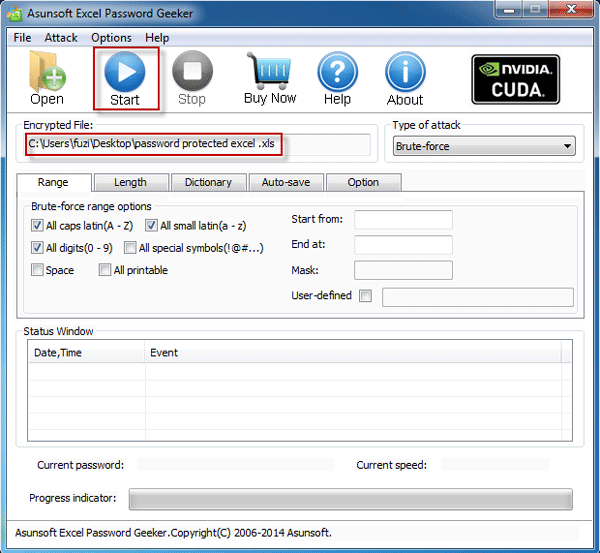
Step 4: So the password protected Excel file is imported into Excel Password Geeker. Click on Start button.
Note: Selecting an appropriate attack type can greatly fasten the recovery speed and shorten the recovery time.
Learn more about the four attack types from Excel Password Geeker.
Step 5: Then the password recovery immediately starts. And you can see the recovery speed is very fast. Quickly your Excel Password is successfully recovered and displayed.


Note: It will take a bit long to recover a very strong Excel password. So if your password is complex enough, just wait patiently until it is recovered.

Step 6: Now click on Copy button and you can paste the password to open your password protected Excel spreadsheet/workbook.


Wednesday, October 8, 2014

Two Ways to Remove Password from Word 2007 Document

How many ways do you know to remove Word Open password? This article shows two easy ways to remove password from Word 2007 document. With the two ways, you also can remove password from Word 2003/2010/2013 document.

Do you think it is very troublesome and a waste of time when you are asked to enter password each time you open a Word document. Do you feel annoying when you get a password protected Word document, but you can’t open it for not knowing its password? Do you feel worried when you forgot/lost your Word document Open password?

If you are troubled by the problems above, you need to remove Word password. Following, see the specific ways.

Way 1: Open Word document to remove its password

If you want your Word document unprotected by password, just open it to remove its password.
Step 1: Double click on your password protected Word document.
Step 2: Enter password to open the Word document.
Step 3: Click on the Office button and select Save As.

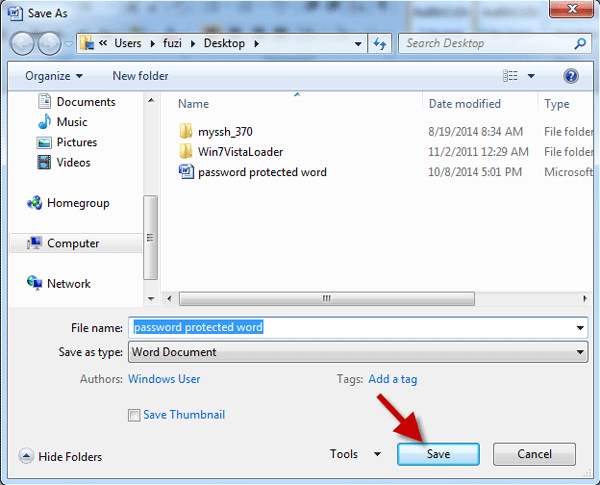
Step 4: Select one location where you will save the word document. Then click on Tools button and select General Options.


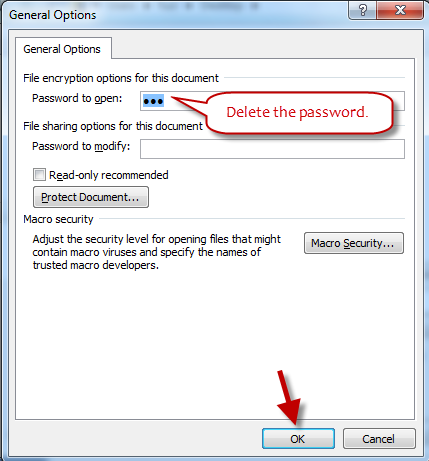
Step 5: In General Options dialog, remove the password to open and click on OK.

Step 6: Click on Save

Now the Word document is unprotected by password. Next time you can directly open it without password.
Way 2: Remove Word document password when locked out.

When you are locked out of a password protected word document for password forgotten or lost, you can remove the password online.
Step 1: Install Word Password Clearer on your computer and then run it.
Step 2: Click on its Open button.


Step 3: Navigate to your password protected Word document and import it to Word Password Clearer.


Step 4: Click on Remove Password button.


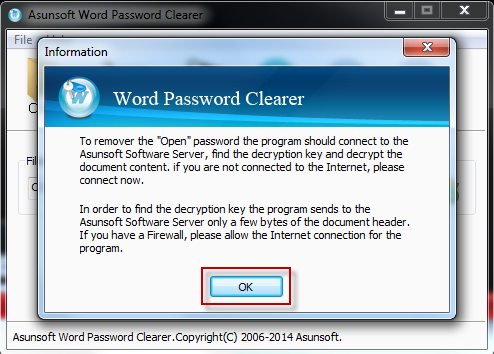
Step 5: You will be told that your Word password will be removed by connecting to Asunsoft server online. Click on OK to confirm.

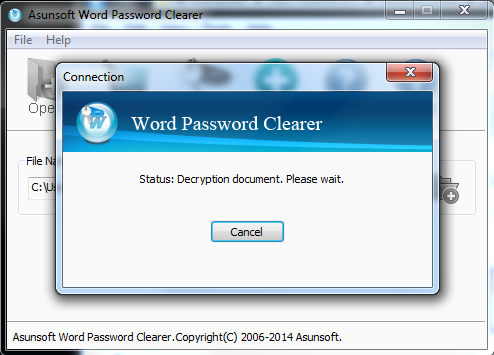
Step 6: Now just patiently wait when the word document decryption is being on.

Step 7: When password is removed successfully, click on Open button to directly open your Word document.


Monday, August 11, 2014

Causes and Solutions for SQL Server Login Failed for User SA


Dear compatriots! Have you ever encountered the situation where you connected to SQL Server but was stuck at the error message saying "Login failed for user 'sa'..."? I have had such an experience for many times. Fortunately the errors got resolved and I regained access to my SA account using. Now let’s have a look at various common errors, causes and solutions for SQL Server SA login failed for user sa depending on different error messages.

Error message 1: 

Login failed for user 'sa'. The user is not associated with a trusted SQL Server connection…


Cause: SQL Server Authentication mode is disabled.

Solution: 

Step 1: Login to SQL Server with Windows Authentication.
Step 2: Right click on your SQL Server instance and select Properties.
Step 3: Select Security page. Check SQL Server and Windows Authentication mode and click OK to save changes.


Step 4: Restart SQL Server services and connect to Server with SQL Server Authentication. Then you can login with the SA account.

Error message 2: 

Login failed for user 'sa'. Reason: The account is disabled. (Microsoft SQL Server, Error: 18470).


Cause: Obviously, your SA account is disabled.

Solution:

Step 1: Login to SQL Server with Windows Authentication.
Step 2: Select Status page. Check Enabled and click on OK to save changes.


Step 3: Restart SQL Server.

Error message 3: 

Login failed for user 'sa'. (Microsoft SQL Server, Error: 18456)


Cause: The entered SA password is incorrect.

Solution:

1. Re-type a correct SA password.
2. If forgot or lost the SA password, then select one of the following 2 methods to reset the SA password.

Method 1: Reset SA password by Windows Authentication

Step 1: Login SQL Server with Windows Authentication mode.
Step 2: In Object Explorer, under the instance folder go to Security -> Logins -> sa.
Step 3: Right click on sa and select Properties.
Step 4: Select the General page. Change the SA password and click on OK to save changes.


Step 5: Restart SQL Server and login with the new SA password.

When Windows Authentication mode is disabled, use the second method below to reset SA password.

Method 2: Reset SA password with Asunsoft SQL Password Geeker.

Step 1: Stop SQL Server services.
Step 2: Install SQL Password Geeker.
Step 3: Import the master.mdf file.
Step 4: Reset the SA password.


Step 5: Restart SQL Server services and re-login SQL Server with the new SA password.

Error message 4:

Login failed for user 'sa' because the account is currently locked out. The system administrator can unlock it.


Cause: You may have had too many failed login attempts with wrong password which results in SA account locked out.

Solution: 

Step 1: Login to SQL Server with Windows authentication mode
Step 2: Go to Security -> Logins -> sa.
Step 3: Double click on sa.
Step 4: Select the General page. Uncheck Enforce password policy and click on OK to save changes.


Step 5: Click on New Query. Type alter login sa with password = ‘yourpassword’ unlock and click on Execute


Then your sa account should have been unlocked.

Error message 5:

A network-related or instance-specific error occurred while establishing a connection to SQL Server. The Server was not found or was not accessible. Verify that the instance name is correct and that SQL Server is configured to allow remote connections….


Cause 1: SQL Server is configured to allow local connections only.

Solution: 

Step 1: Click on Start -> All Programs -> SQL Server -> Configuration Tools -> SQL Server Surface Area Configuration.
Step 2: Click on Surface Area Configuration for Services and Connections.


Step 3: Expand the instance folder. Go to Database Engine -> Remote Connections.
Step 4: Check Local and remote connections. Then re-login to SQL Server.


Cause 2: SQL Server services are not running.

Solution: 

Open SQL Server Management Studio to start SQL Server services and then re-login to SQL Server.