When connecting to SQL Server, you will need to select one authentication mode. Some users chose Windows Authentication mode when installation, but later needed to change it. This article explains how to change SQL Server Windows authentication mode to mixed mode.
You need to:
Change Authentication mode with SQL Server Management Studio
If the SQL Server Management Studio is installed when installing SQL Server, you can change the authentication with it.
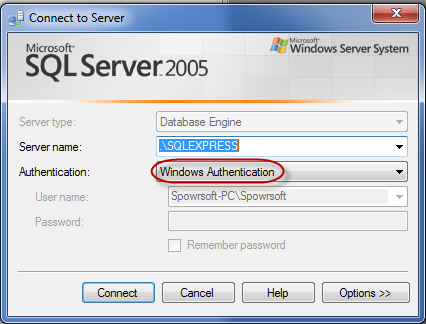
Step 1: Launch SQL Server Management Studio. (Generally, when SQL Server installation is complete, SQL Server Management Studio will be added to your Windows Start screen. Just click on Start -> SQL Server Management Studio to quickly launch it.) Then enter server name and select Windows Authentication mode to connect.
Step 3: The Server Properties dialog box pops up. Select the Security page. Pick the "SQL Server and Windows Authentication mode". Then click on OK.
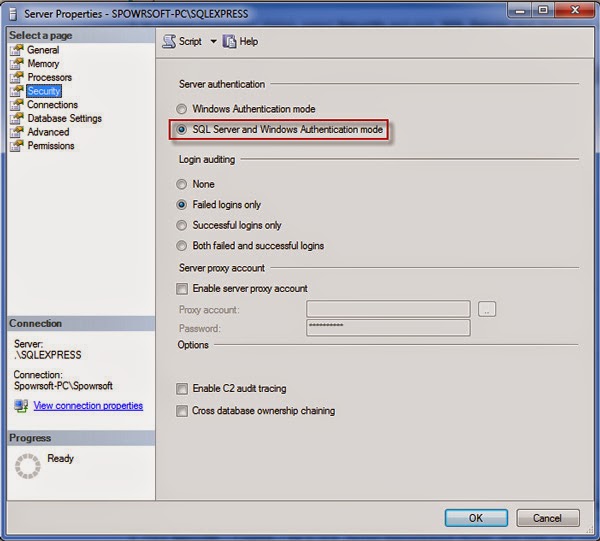
Now you have changed Windows Authentication mode to mixed Authentication mode.
Important: To connect to server with SQL Server Authentication mode you firstly need to enable the sa user which is disabled by default.
Enable SA account
- In Object Explorer, expand the root directory and go to Security -> Logins -> sa.
- Double click on the sa to open login properties dialog.
- Select General page. Remove the default sa password and type a new one.
- Select Status page. Check Enabled.
- Now you can disconnect Object Explorer and exit SQL Server. Then re-connect with SQL Server Authentication mode. And you will need to type sa password to login.
No comments:
Post a Comment